一、概述
源码安装 mysql 的步骤比较繁琐,各种不小心然后导致了各种错误,鼓捣了一下午终于搞定,建议直接用 yum install mysql 命令 安装,简单省事 。
系统环境:CentOS6.9,腾讯云。
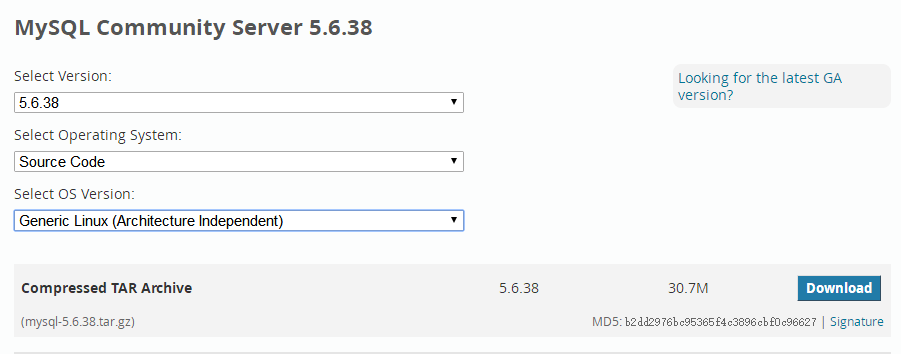
下载地址:https://dev.mysql.com/downloads/mysql/,特别小心不要下错了包。
二、安装
1. 安装依赖库
|
1 2 3 4 5 6 |
#centos yum -y install gcc gcc-c++ gcc-g77 autoconf automake zlib* fiex* libxml* ncurses-devel libmcrypt* libtool-ltdl-devel* make cmake # ubuntu apt-get install g++ bison libncurses5-dev cmake |
2. 添加用户
|
1 2 |
groupadd mysql useradd -g mysql -s /sbin/nologin mysql |
3. 解压、编译安装
|
1 2 |
tar -zxvf mysql-5.6.38.tar.gz cd mysql-5.6.38 |
编译选项,参考 https://dev.mysql.com/doc/refman/5.6/en/source-configuration-options.html
删掉所有的注释信息,注意每行的前面必须要一个空格,且后面不能有空格:
|
1 2 3 4 5 6 7 8 9 10 11 |
cmake -DCMAKE_INSTALL_PREFIX=/usr/local/mysql -DMYSQL_UNIX_ADDR=/usr/local/mysql/mysql.sock -DDEFAULT_CHARSET=utf8 -DDEFAULT_COLLATION=utf8_general_ci -DWITH_INNOBASE_STORAGE_ENGINE=1 -DWITH_ARCHIVE_STORAGE_ENGINE=1 -DWITH_BLACKHOLE_STORAGE_ENGINE=1 -DMYSQL_DATADIR=/data/mysqldb -DMYSQL_TCP_PORT=3306 -DENABLE_DOWNLOADS=1 |
没有错误发生的话就可以编译安装了:make && make install
安装完成后,进入/usr/local/mysql 目录:
|
1 2 3 4 5 6 7 8 9 10 11 12 13 14 15 16 |
[root@vm mysql]# ll total 72 drwxr-xr-x 2 root root 4096 Oct 22 16:42 bin -rw-r--r-- 1 root root 17987 Sep 13 23:20 COPYING drwxr-xr-x 3 root root 4096 Oct 22 16:41 data drwxr-xr-x 2 root root 4096 Oct 22 16:41 docs drwxr-xr-x 3 root root 4096 Oct 22 16:41 include -rw-r--r-- 1 root root 301 Sep 13 23:20 INSTALL-BINARY drwxr-xr-x 3 root root 4096 Oct 22 16:41 lib drwxr-xr-x 4 root root 4096 Oct 22 16:42 man drwxr-xr-x 10 root root 4096 Oct 22 16:42 mysql-test -rw-r--r-- 1 root root 2496 Sep 13 23:20 README drwxr-xr-x 2 root root 4096 Oct 22 16:42 scripts drwxr-xr-x 27 root root 4096 Oct 22 16:42 share drwxr-xr-x 4 root root 4096 Oct 22 16:42 sql-bench drwxr-xr-x 2 root root 4096 Oct 22 16:42 support-files |
3. 配置
添加环境变量,把安装目录下的 bin 目录包含到环境变量中:
|
1 2 3 |
vi /etc/profile export PATH=$PATH:/usr/local/mysql/bin source /etc/profile |
改变 mysql 主目录所有者为 mysql 并设置相关配置信息:
|
1 2 3 4 5 6 7 8 9 10 11 |
chown -R mysql:mysql /usr/local/mysql cd /usr/local/mysql # 配置文件根据机器配置的好坏选择不同的配置文档 cp support-files/my-small.cnf /etc/my.cnf ./scripts/mysql_install_db --datadir=/home/mysql/data --basedir=/usr/local/mysql --user=mysql # 添加 mysqld 到服务 cp support-files/mysql.server /etc/init.d/mysqld # 添加权限 chmod +x /etc/init.d/mysqld # 设置开机自启 chkconfig --add /etc/init.d/mysqld |
启动 mysql 服务:
|
1 2 |
service mysqld start # Starting MySQL.. SUCCESS! # 出现这个表示安装成功了 |
修改 root 密码:
|
1 |
mysqladmin -u root password "yourpassword" |
修改好密码后登录测试,出现以下信息则表示安装成功:
|
1 2 3 4 5 6 7 8 9 10 11 12 13 14 15 16 |
mysql -u root -p Enter password: ############### Welcome to the MySQL monitor. Commands end with ; or g. Your MySQL connection id is 9 Server version: 5.5.58 Source distribution Copyright (c) 2000, 2017, Oracle and/or its affiliates. All rights reserved. Oracle is a registered trademark of Oracle Corporation and/or its affiliates. Other names may be trademarks of their respective owners. Type "help;" or "h" for help. Type "c" to clear the current input statement. mysql> |
三、其他
1. 允许 root 远程登录
先添加防火墙,如果是云主机的话还要去控制台开启安全组,一般的服务商都会有这个设置。
|
1 |
iptables -A INPUT -p tcp --dport 3306 -j ACCEPT |
进入 mysql,输入以下命令,123456 是你的密码:
|
1 2 |
GRANT ALL PRIVILEGES ON *.* TO "root"@"%" IDENTIFIED BY "123456" WITH GRANT OPTION; FLUSH PRIVILEGES; |